
Take your few minutes to try these tips to boost your PC 10 times faster than ever before. Some of these tasks can be performed by the system settings while some can be done by third-party Softwares. So move forward and start boosting your machine.
1. Keeping your windows Updated is a better choice
This is the first and pretty easy way you can try to keep your system faster. Basically, Windows brings an updated version to improve the system performance. So surely it will help you to make your PC faster.
Have you ever feel more lags before the Windows update? definitely, you had. so update your machine regularly.
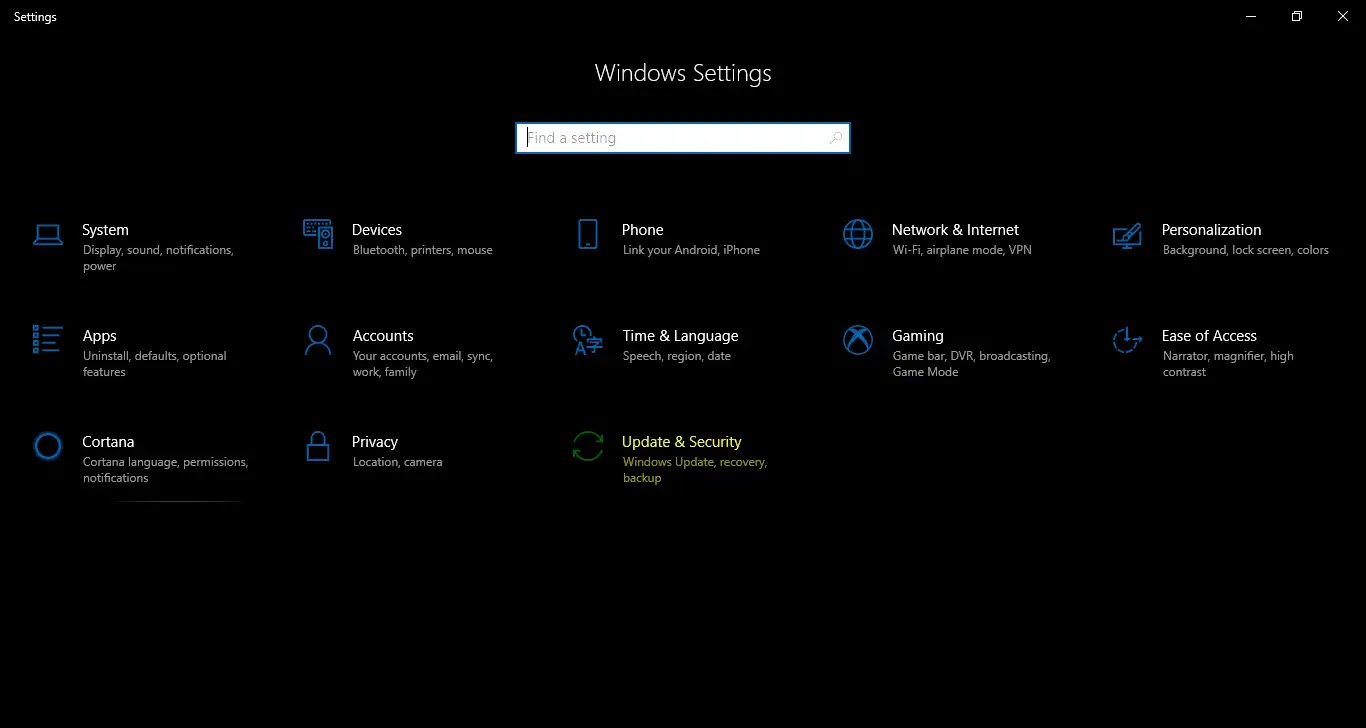
Steps to Update Windows 10
- Click on the Windows icon in the bottom left of your screen.
- Click on the settings icon or search for settings.
- Click on the ‘Update and Security’ settings option.
- Now click on check for update.
Install the latest update available for your machine.
2. Configure Power Options for best performance
The power option is the collection of hardware and system settings that manage how your computer uses power. You can optimize it for the best performance according to your need.
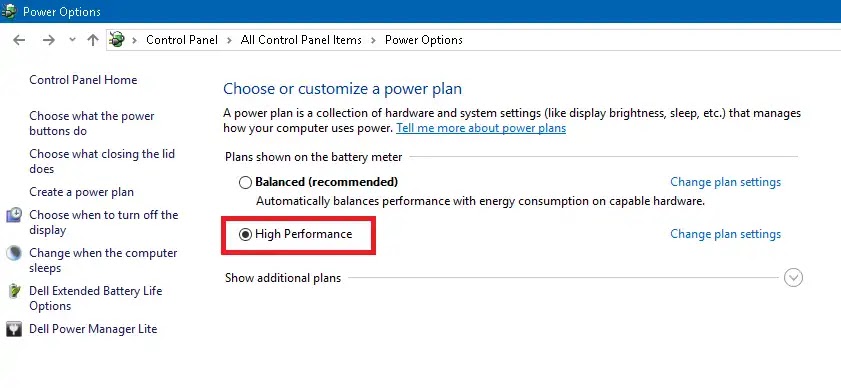
Steps to Configure Power Options –
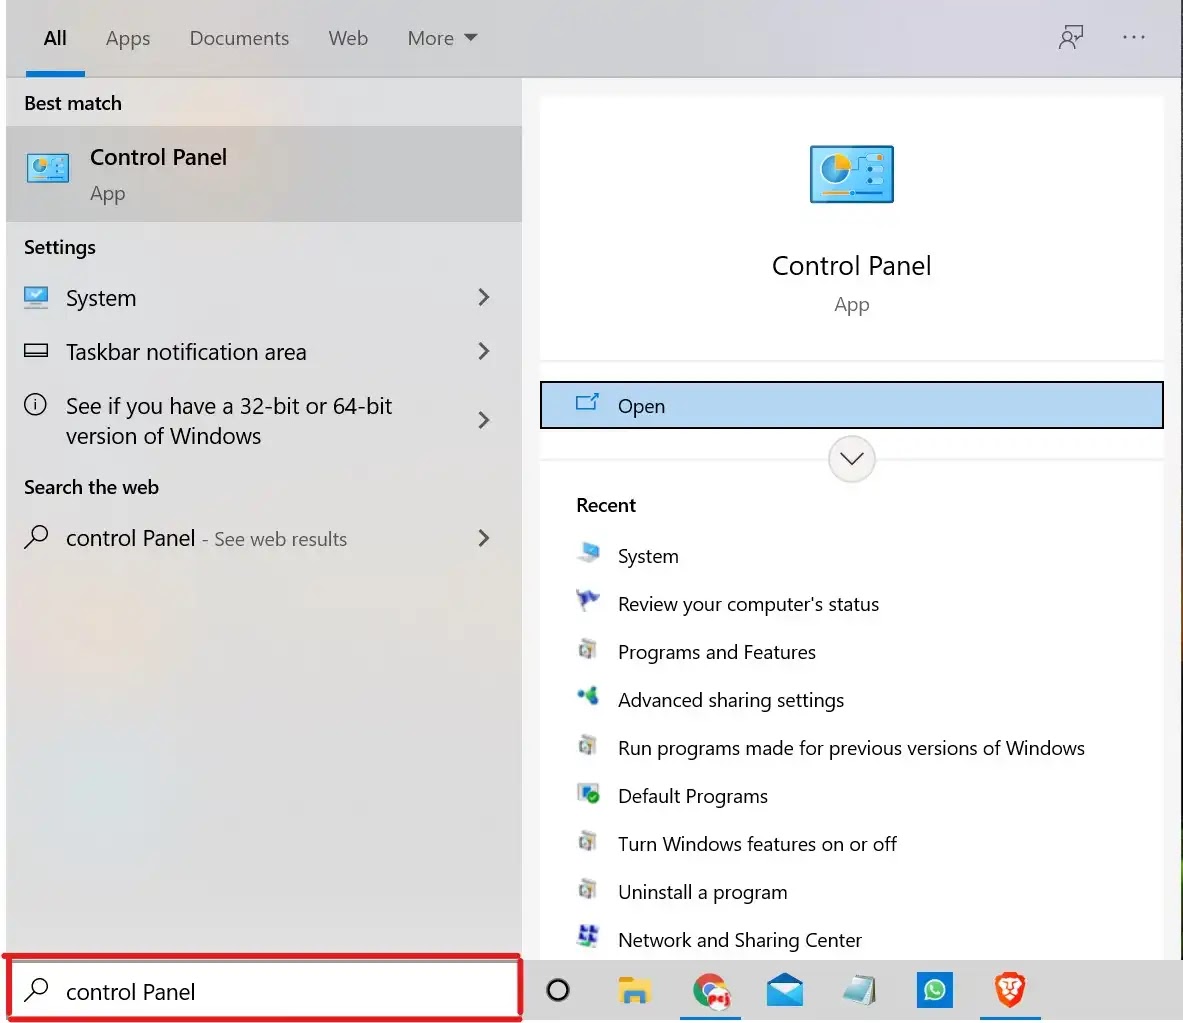
- Click on the search box in the taskbar and search for the control panel.
- Click on the control panel.
- Look for the power option. and click on it.
- Change it from balanced (recommended) to high performance.
- Now it’s already done it’s halfway.
- If you want to config more you can proceed with step 7.
- After selecting High-performance click on change plan settings.
- You can now set the time for your screen to sleep during battery power or for plugged in.
- You can change more settings by clicking the change advanced power settings option.
- You are done now.
3. Keep Your Boot time Lower
Are you waiting for your PC to boot for a minutes or more? By following these steps you can boot your PC in just 3 seconds.
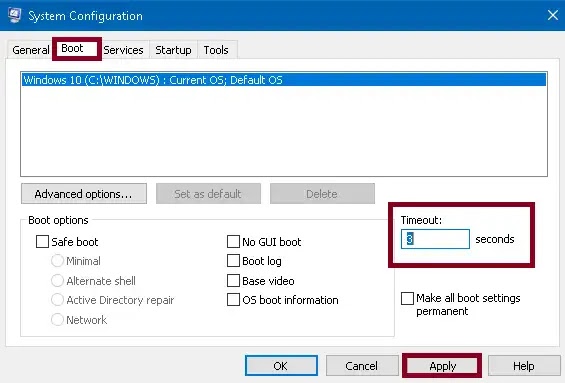
Steps to low the boot time.
Press the Windows logo key + R to open the run window.
Write “msconfig” in the Run dialogue box and hit Enter.
A new dialogue box will appear on the screen. Select the boot tab in this window.
Now you will see the timeout option at the right bottom of the window.
Change it to 3 sec.
Now you are all set. Click on the apply button and then OK.
4. Delete the Temporary or Foo Files
Temporary files are files created to temporarily contain information while a new file is being made and it may consume much more memory of your system and leads to the slower performance of your PC. So it is recommended to delete all the temp files of your system because you don’t need these files anymore.
There are two types of temporary files i.e. %temp% and temp. we will delete both places. Let’s see step by step.
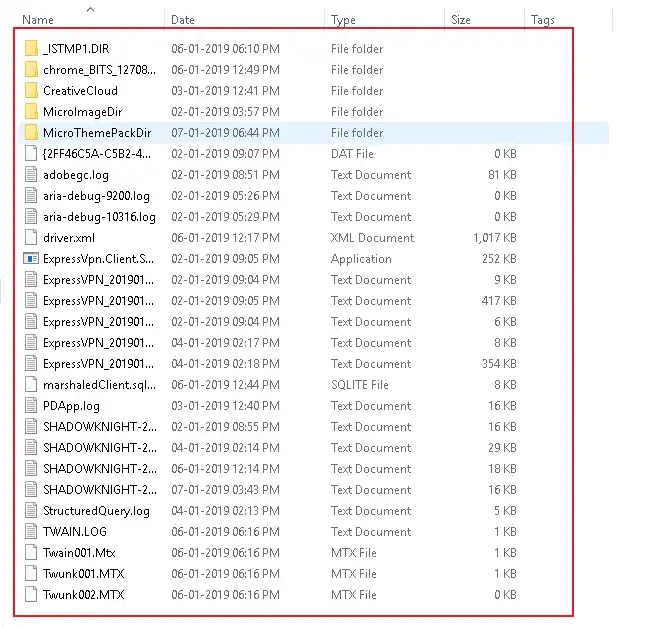
Steps to Delete %temp% files.
- Press the Windows logo key + R to open the run window.
- Now type “%temp%” as it is in the search box. Hit Enter.
- Press Ctrl+A to select all files.
- Press the Shift+Delete key to delete all selected files permanently.
- Click YES.
If you have done the above steps, then you should do the next process to clear all the temp files that weren’t there.
Replace %temp% with temp
Steps to delete temp files.
- Press the Windows logo key + R to open the Run window.
- Now type “temp” as it is in the search box and hit Enter. (This may ask you for the administrator’s permission hit yes.)
- Press Ctrl+A to select all files.
- Press the Shift+Delete key to delete all selected files permanently.
- Click YES (Some of these files may not be deleted simply skip those which is not deleted).
Open this file location to access Temp
You are done with both the procedure now let’s move forward.
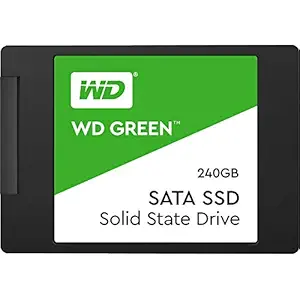
5. Installing an SSD storage
6. Adding more RAM
7. Clearing Prefetch of your files to clean the Garbage
Each time you turn on your computer, Windows keeps track of the way your computer starts and which programs you commonly open, These files are commonly stored in the prefetch folder a subfolder of the Windows system folder. So you don’t need these files at all. then why keep these files, just delete them to keep your space free. That’s where it helps to speed up your computer speed and if you know Hindi then Super Speed Computer Course Hindi PDF can guide you better.
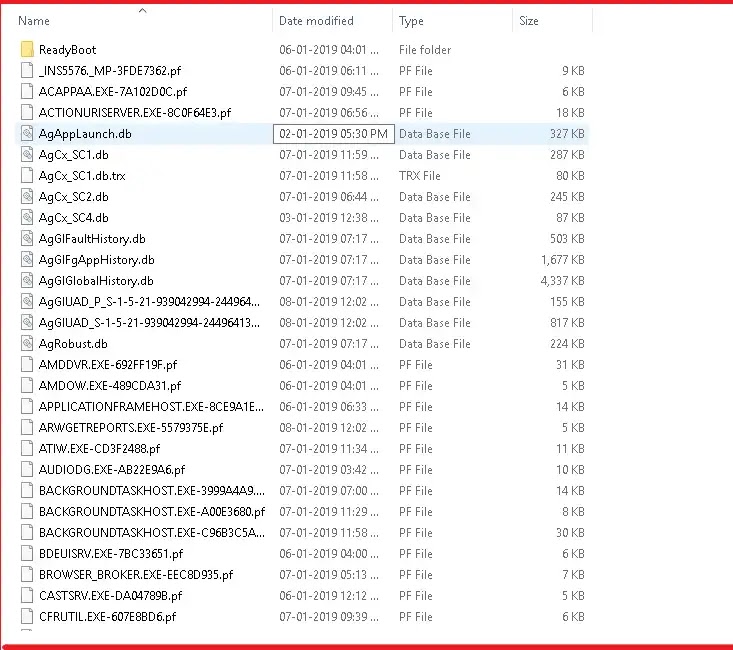
Steps to delete the Prefetch files
- Press the Windows key + R. to open the Run dialogue window.
- Type “Prefetch” in the search box and hit Enter.
- Now this will ask you for administrative permission.
- Click on continue. And then YES.
- Now press CTRL+A to select all the files there.
- Press SHIFT+DELETE to delete all the selected files permanently.
- Click YES.
- If some of them will not be deleted, Just skip that file and exit the window.
You are all done. Let’s perform the next step.
8. Stop unwanted startup programmes
Some programmes are set to be autostarted during the system boot-up by Windows. But some of them may be useless for you to start during boot. That means you should check all the startup programmes and disable the useless programme for you.
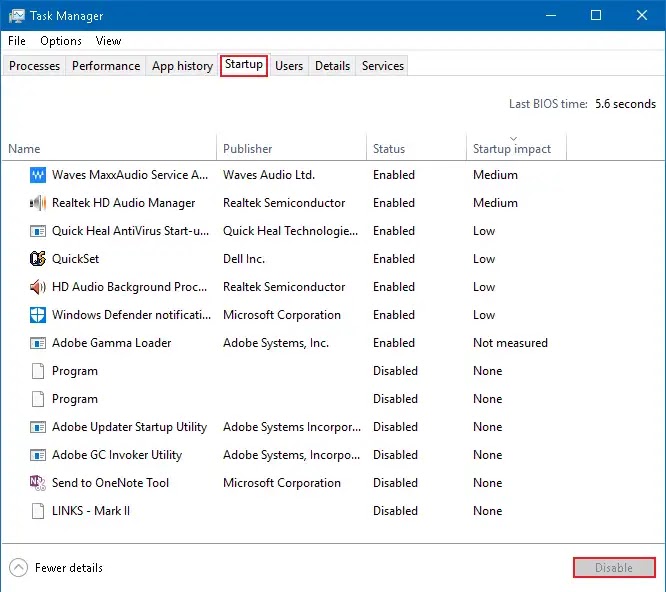
Steps to Disable the Programmes to start during Boot –
- Right-click on the Taskbar (anywhere).
- Click on Task Manager.
- Go to the Startup tab to see the list of programmes.
- Select the programme you wish to disable.
- Click on the DISABLE button on the right bottom of the window.
Now, this programme will not start without your concern anymore.
9. Closing Background Process of Software that you hardly use
The background process uses your processor power without letting you know. You are not gonna know what’s going on in the background process but it will degrade your processor performance. So it’s an ideal decision to kill the background processes.
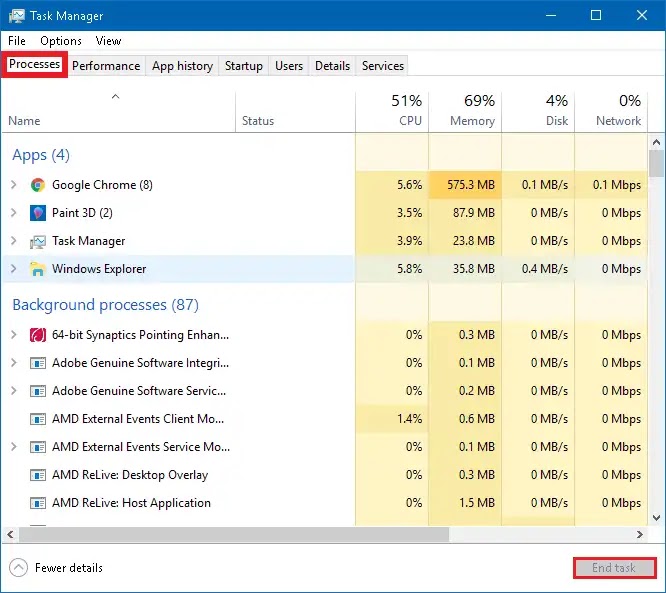
Steps to Kill the Background Processes that aren’t in use.
- Right, click on TASKBAR.
- Click on the TASK MANAGER.
- Select the process you want to kill.
- Click on END TASK on the right bottom of the window.
10. Scan for Malware
There are many types of Malware that can be used for different purposes by hackers.
11. Disable Visual Effects
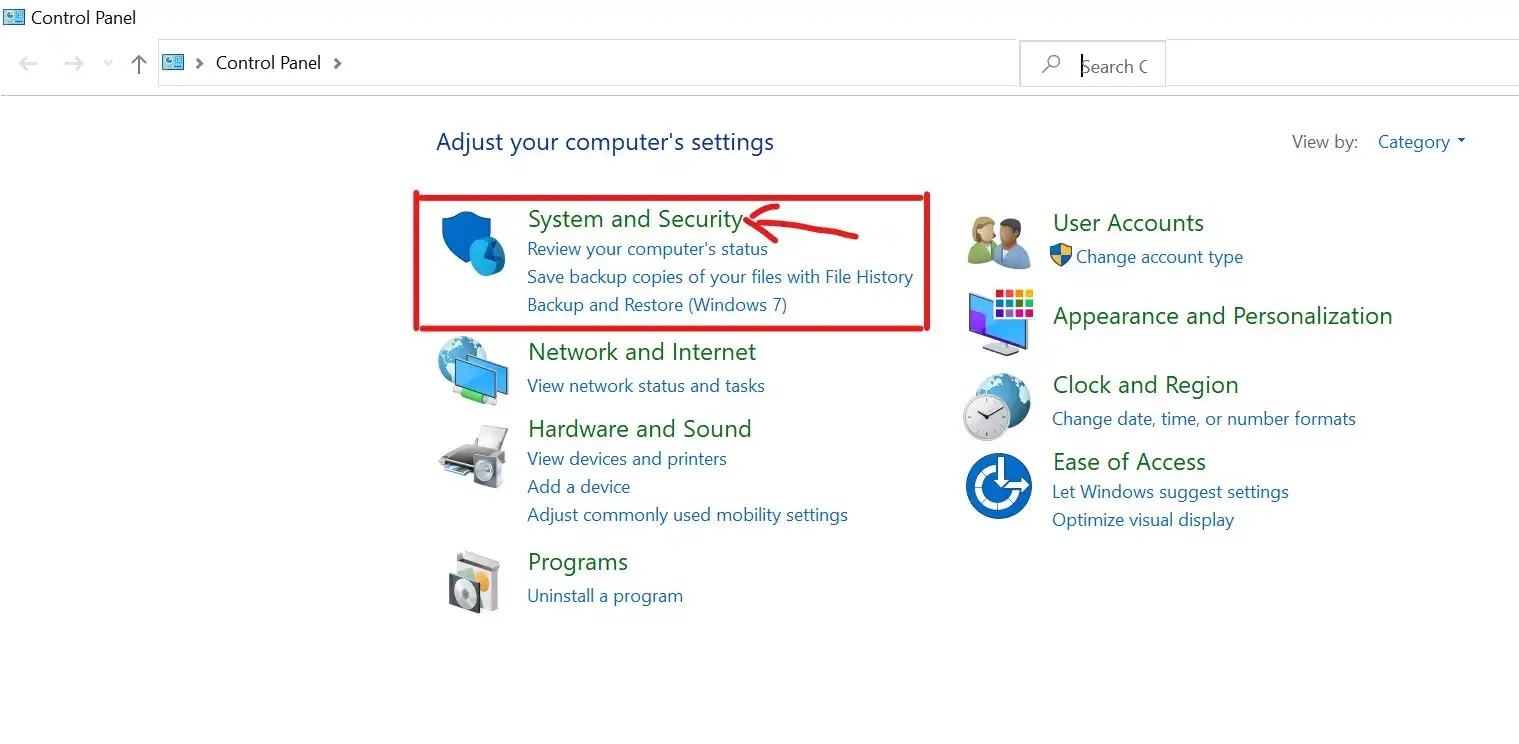
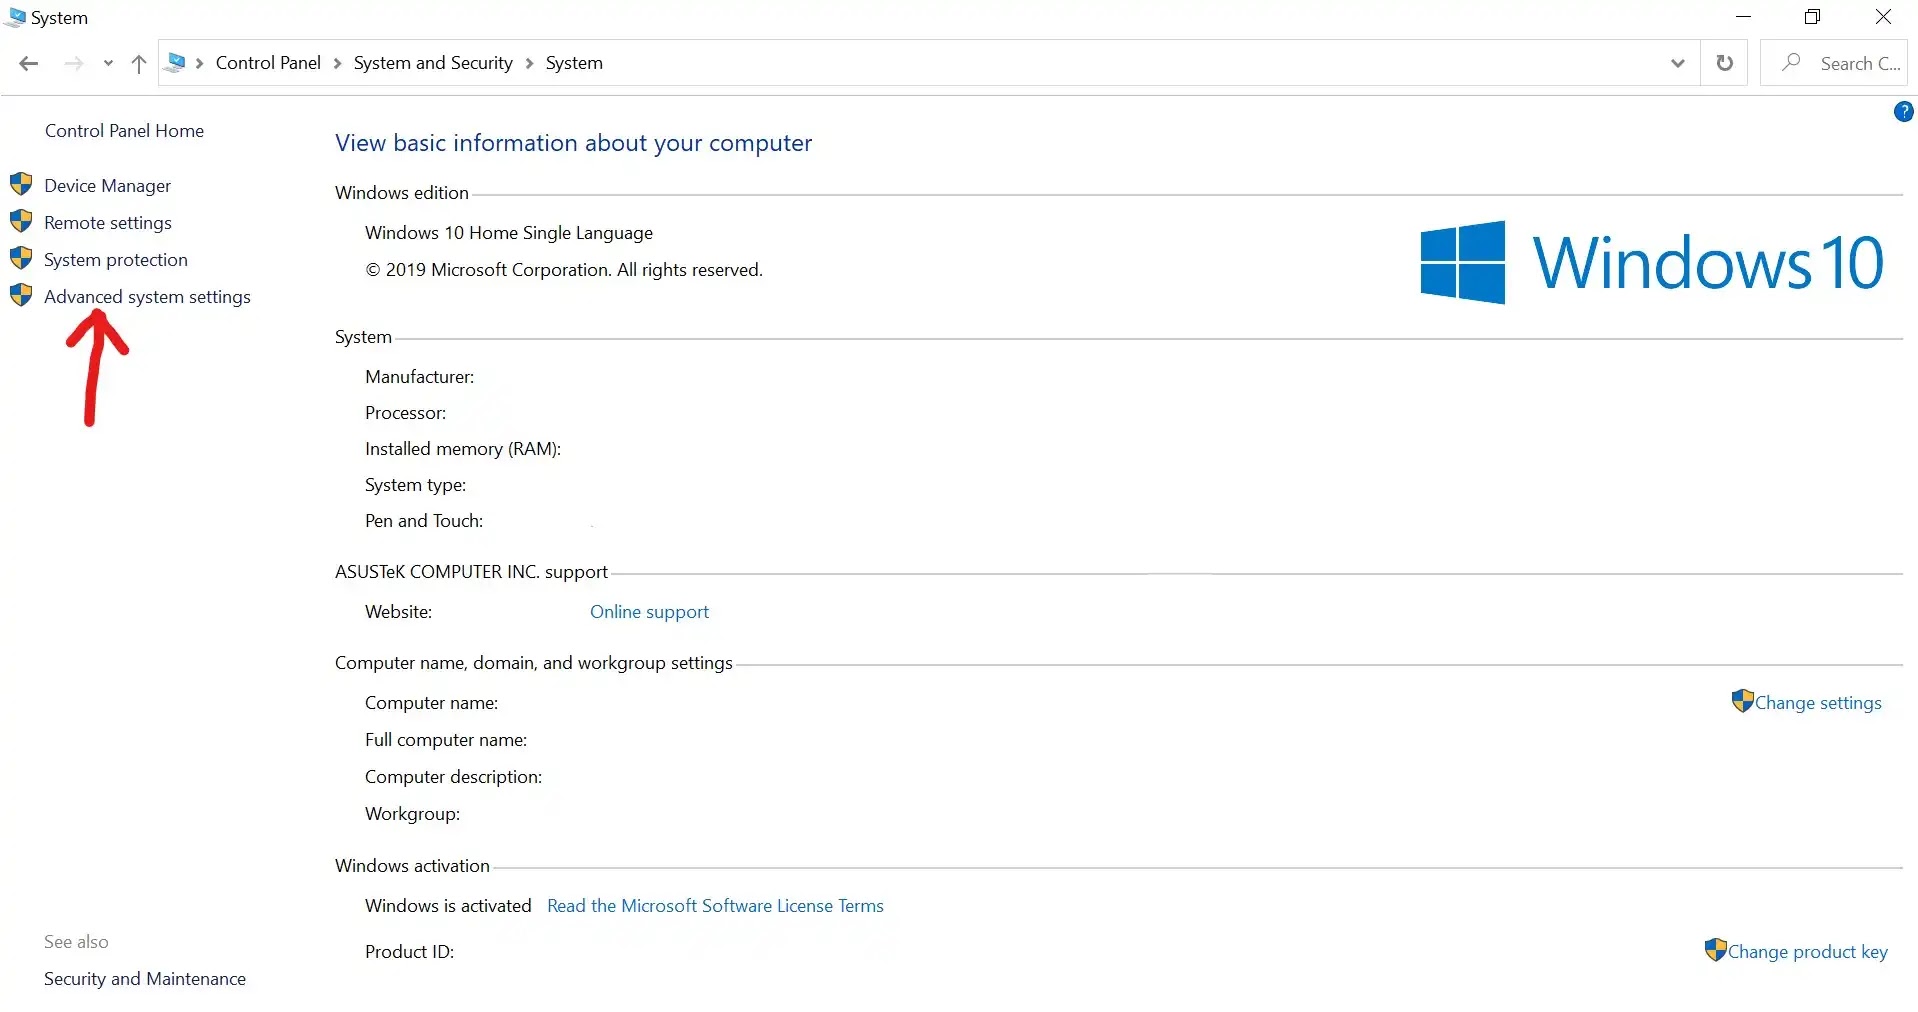
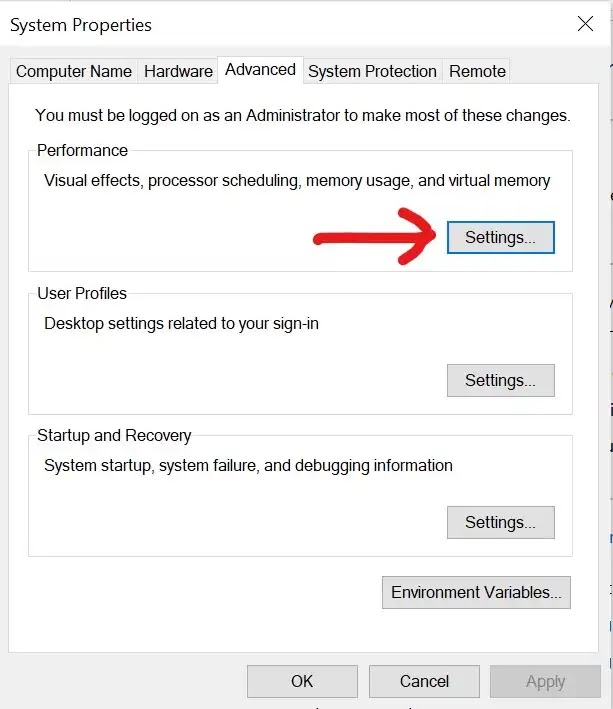
Visual Effect is transitions and animation shown by windows to look better and nothing else. At the same time, we don’t need it basically and also this uses our process and may lead to some lags. We are looking for the best performance, not the great look. Right? So we will disable these effects to use the process in another way. Let’s do that.


But for now, If you get help from this post, share this post with your friends and someone who you think can get help with this post.