
GPay is one of the most used payments app used in India. To do payments you just have to connect your bank account to Google Pay app and it will be ready to do payments anywhere.
But many times due to some errors it becomes hard to link the bank accounts to GPay due to an SMS not sending issue. Where the Google Pay app says “Can’t send SMS”. This mostly happens when we try to link a bank account in the GPay app.
So in this post, we are talking about all possible solutions for this specific error so do apply them all to solve this issue. Also, note that incorrect OTP error code zr, google pay verification SMS could not be sent to iPhone similar problems.
Page navigation
How to Fix Can’t send SMS In the GPay app
There may be several reasons behind this issue and we dont know what is the exact issue from your side. So go one by one and one solution will be useful for you.
1. Set date and time
This error is most common due to incorrect date and time so you only need to set the correct date and time. If you already have the correct date and time then skip this solution.
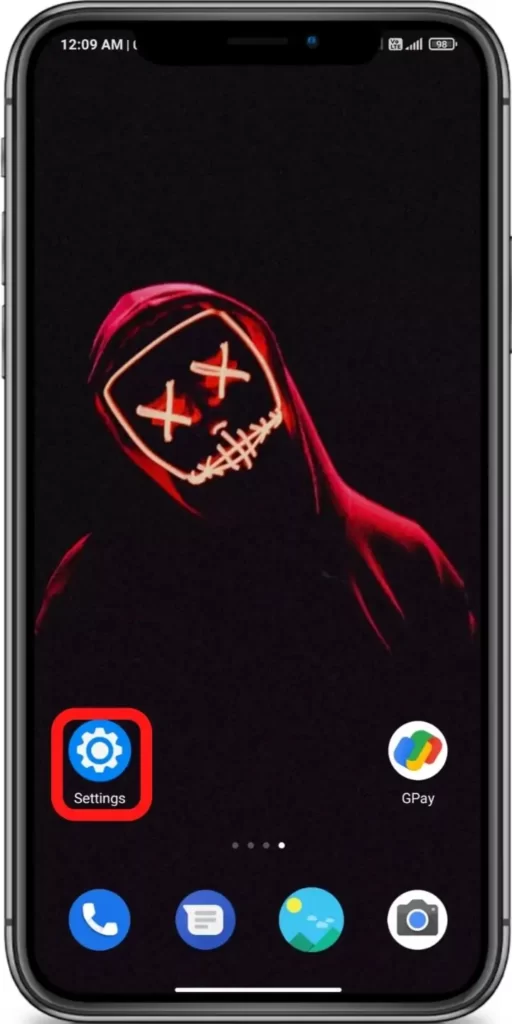
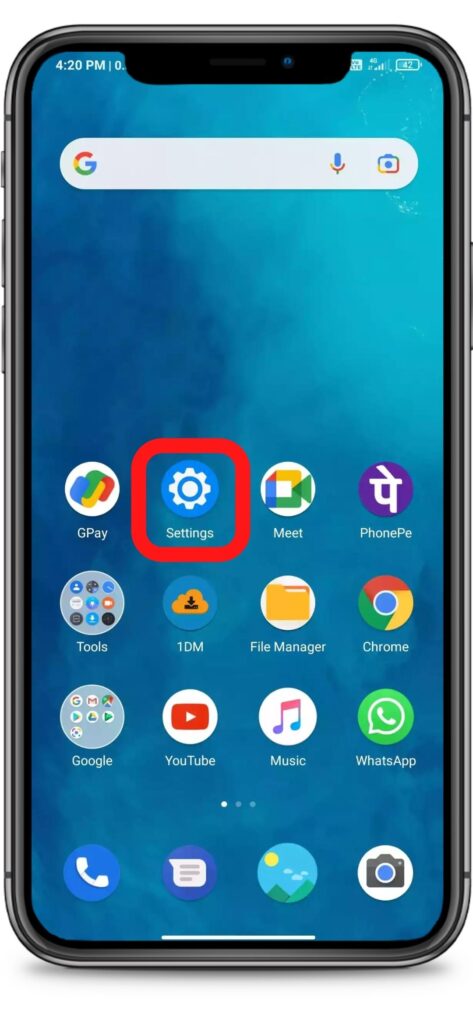
Open phone Settings ‘⚙’.
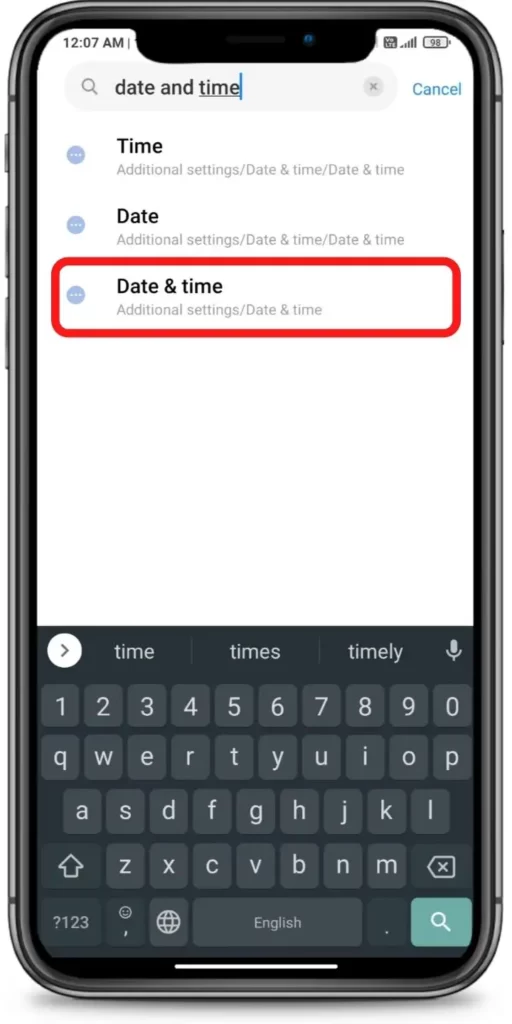
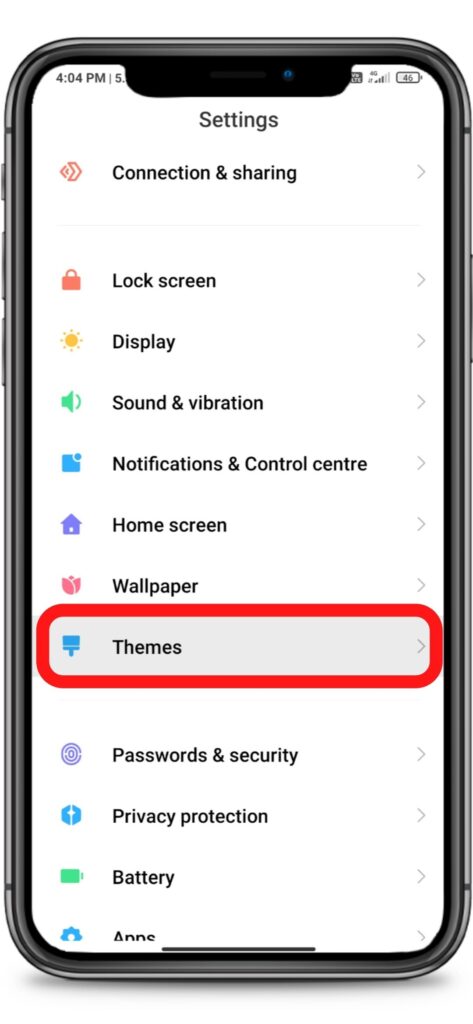
Search for Date and Time & Open it.
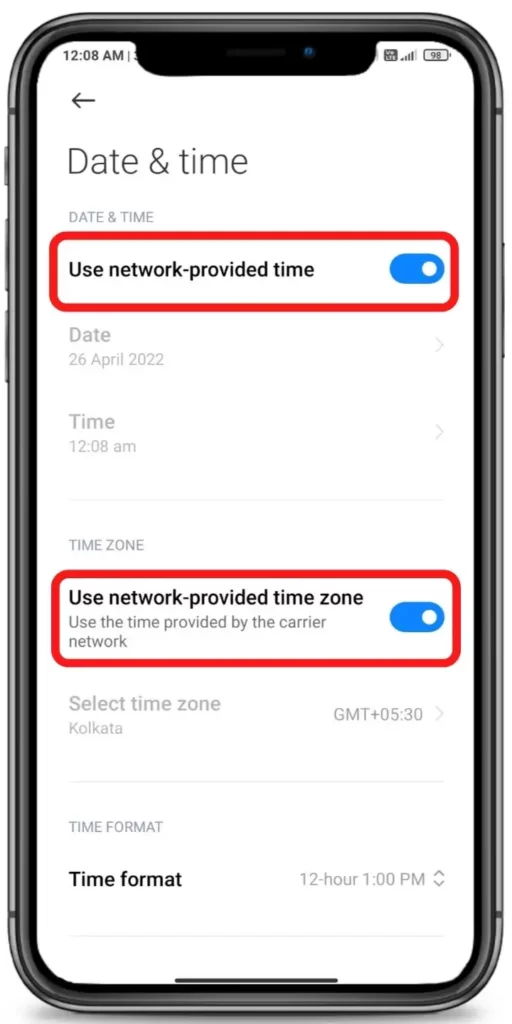
Turn on ‘Use network-provided time’ & ‘Use network-provided time zone’




2. Correct Number & Linking it
Make sure you have typed the correct number and it should be linked to the same bank. If you have recently linked it then it may take time to refresh your online status. You can visit your bank branch or contact them online to check if your number is linked to your bank account or not.
3. Allow permission
Sometimes due to a lack of permission to send SMS, this error may emerge so you have to allow the GPay app to send or receive SMS.
- Long tap on the GPay app’s icon then tap on the ‘App info’.
- Now navigate to ‘App permissions’.
- Then tap on the ‘SMS’ section and click allow.
4. Check the internet
Sometimes your current internet source becomes useless for using GPay in such case you get such error. You may face a situation where your Instagram is working, google search is working but GPay still showing such an issue.
So, try connecting to different Internet if available. If you have different network provider Internet then try using that, or if you have broadband WI-FI then try using that too, in some cases this solution works!
5. Clear Cache and Clear data
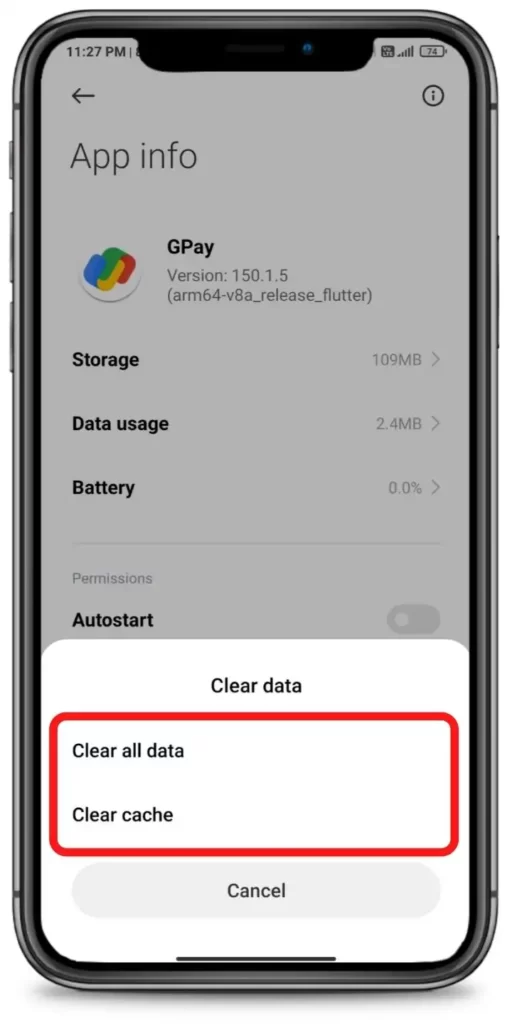
Clearing the cache of the GPay app will not delete any important data but ‘Clear all data’ will delete all data of the GPay app basically it will reset the app and you will have to set up the GPay app again from start.
Firstly try clearing the cache if it dont works then try to Clear all data.
Steps to clear cache and clear all data of GPay.
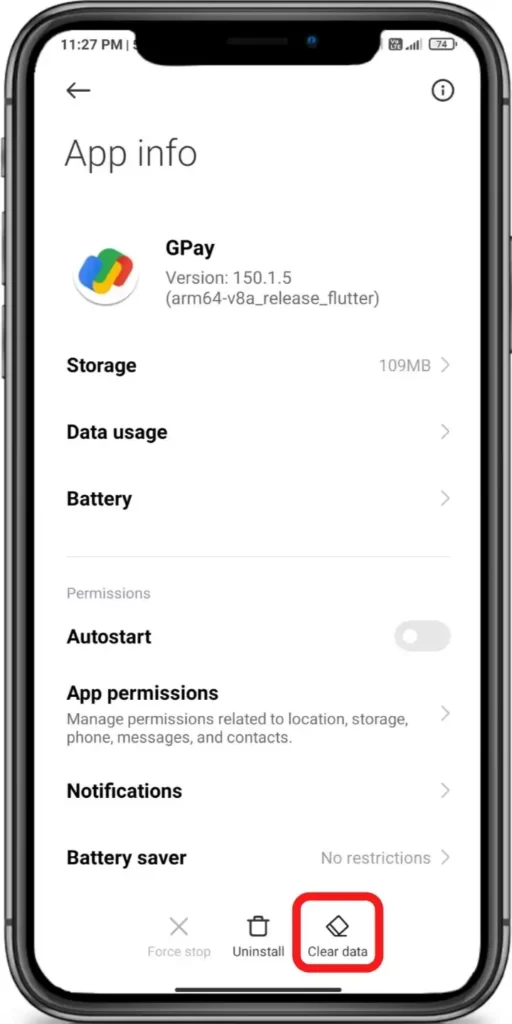
Long tap on the GPay app’s icon then tap on the ‘App info’. (Basically, tap on the ‘ⓘ’ symbol)
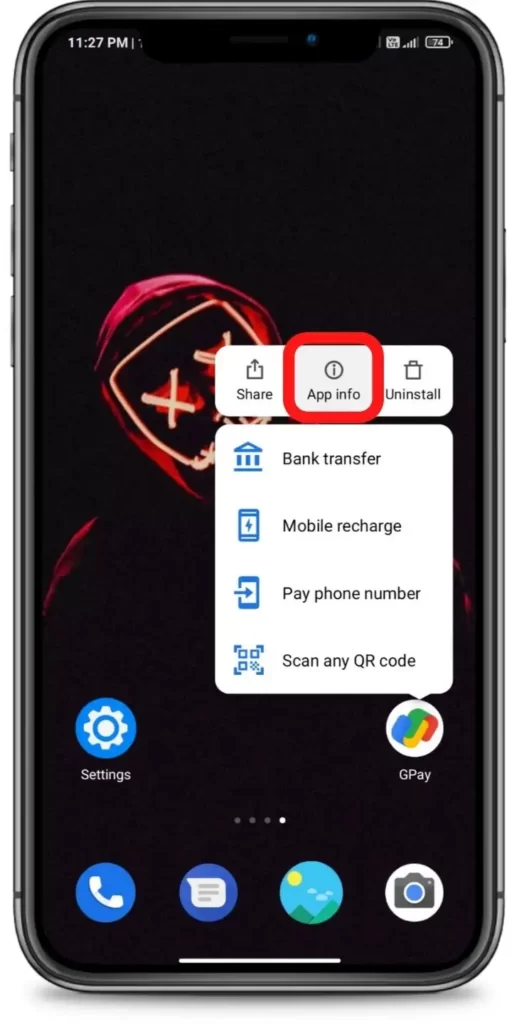
Now tap on the ‘Clear data’.
Then tap on the ‘Clear Cache’ or ‘Clear all data’ Done!


6. Update GPay
If you are running an old version of GPay then it may have some bugs. So try installing the updated version of apps from different App Download Sites or from Playstore.
To Update GPay from the Play Store follow the steps mentioned below:
1. Open the Play Store app then tap on your profile present in the upper-right corner.
2. Then go to ‘Manage apps and device’ and go to ‘Updates available’.
3. Then find GPay and tap Update.
If GPay is not on the list then your App must be up to date already. In this case, follow the next solution.
7. Restart The device
Sometimes your smartphone gets some bugs and in such cases rebooting your smartphone is the best option that you can do to overcome such bugs. Simultaneously, restarting can resolve the problem related to the network.
8. Contact support
Unfortunately, If all the above solutions didn’t work, then try contacting the support team of GPay they will definitely help you to solve your problem for sure.
Have any other questions? then do ask us in the comment box below, you can also share your thoughts on this issue.
Nice helpful